Maximize Functionality with Fenster Components’ Quicksash Double Hung Sash Kit
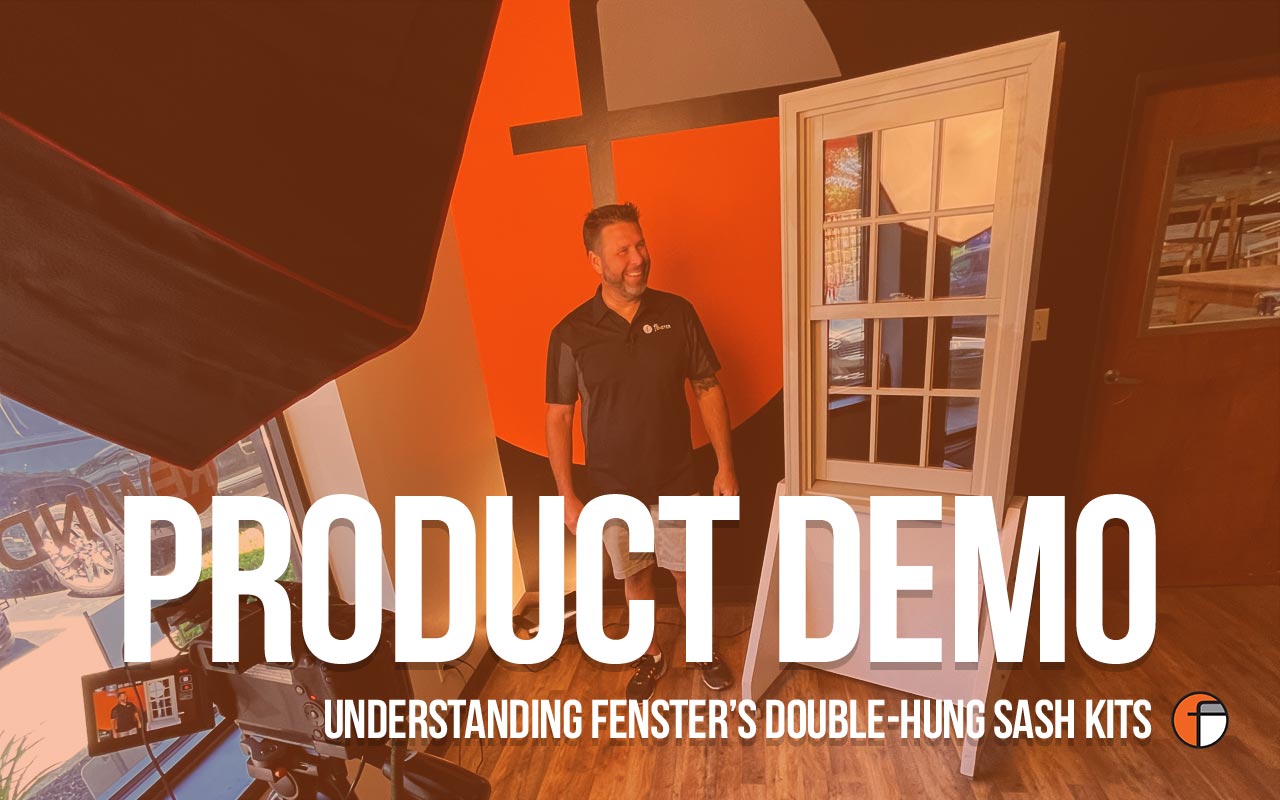
The Quicksash Double Hung Sash Kit by Fenster Components offers a comprehensive solution for upgrading wooden windows with vinyl compression jamb liners. In this article, we dive into the key takeaways and themes discussed by Ryan, The Sash Guy at Fenster Components, in this informative video & transcript.
Key Takeaways
- Understanding the universal compatibility and necessity of matched pairs in double-hung sashes.
- Importance of accurate measurements and considerations for proper fitment.
- Design and customization options for enhancing the aesthetics and functionality of the sash kit.
Universal Compatibility and Matched Pairs for Double-Hung Windows
The Significance of Matched Pairs in Double-Hung Window Replacement
According to Ryan, the sashes in the Quicksash Double Hung Sash Kit must be a matched pair (top and bottom sash) to ensure proper alignment and sealing at the meeting rail. This emphasis on matched pairs highlights the importance of uniformity in window components for optimal functionality. Ryan explains that intermixing different brands or models can lead to issues with alignment, ultimately impacting the window’s performance.
Ryan’s insight underscores the precision required in window replacements and the need for a comprehensive kit like the Quicksash Double Hung Sash Kit to address compatibility challenges effectively. The focus on matched pairs serves as a foundational principle for ensuring the successful installation and operation of the sash kit.
Accurate Measurements and Fitment Considerations for Double-Hung Windows
Importance of Precise Measurements for Double-Hung Window Installation
Ryan underscores the significance of accurate measurements in determining the compatibility of the Quicksash Double Hung Sash Kit with existing window frames. He highlights specific measurement criteria, such as the width of the sashes and the height of the vinyl jamb liners, to facilitate a proper fit.
The kit accommodates variations in window dimensions and construction by allowing for a plus or minus 1/8th of an inch tolerance in measurements. Ryan’s guidance on measurement precision underscores the attention to detail required in assessing fitment and showcases the kit’s adaptability to diverse window configurations.
Enhancing Aesthetics and Functionality with Customization Options
Customization Options for Personalization
In discussing design and available options, Ryan outlines various customization choices for the Quicksash Double Hung Sash Kit, including exterior finishes, grille options, and interior finishes. The range of finishes, grille types, and design elements allows customers to personalize their windows to match their aesthetic preferences and architectural styles.
By incorporating features like cladding options, grille styles, and interior finishes, the kit offers versatility in design while maintaining its universal compatibility. Ryan’s exploration of customization possibilities reflects Fenster Components’ commitment to providing tailored solutions for enhancing both the aesthetics and functionality of wooden windows.
Recap of Key Benefits and Features of Quicksash Double Hung Sash Kit
The insights shared by Ryan in this video highlight the essential considerations for maximizing efficiency and functionality with the Quicksash Double Hung Sash Kit. From emphasizing the importance of matched pairs and precise measurements to exploring design customization options, the transcript provides valuable guidance for customers seeking to elevate their window replacements.
By prioritizing universal compatibility, accuracy in measurements, and design flexibility, Fenster Components empowers customers to transform their wooden windows with confidence and convenience. The Quicksash Double Hung Sash Kit stands as a versatile solution that marries functionality with aesthetics to meet the diverse needs of window replacement projects. Through an in-depth exploration of universal compatibility, fitment precision, and design customization, we have shed light on the transformative potential of the sash kit for upgrading wooden windows.
START YOUR QUOTE TODAY FOR DOUBLE-HUNG WINDOWS UPGRADES
If you’re ready to replace your worn-out double-hung sashes, start your FREE quote today.
CONNECT WITH FENSTER ON SOCIAL MEDIA:
Instagram | Facebook | YouTube | Website
VIDEO TRANSCRIPT
0:00:07 – (Ryan): Hi, I’m Ryan, the sash guy for Fenster components. We’re here looking today at the quicksash double-hung sash kit. Now, if you’re looking at this video on YouTube and not on our website, I wanted to point out that we have drawings and photos of this kit along with a full description of the specifications of this product. But we have a lot of the same questions all the time about this product. So we thought a demonstration video would be a good idea.
0:00:37 – (Ryan): So let’s get started. It is a full-opening kit. It comes with the upper and lower sash set, and it comes with a new set of what we call Jamb liners. Or you might be comfortable with balances or balancers or plastic tracks with the springs in it. Whatever terminology you’re comfortable with, it comes with the new upper and lower sash and then the new jamb layer. Now, it is sold as a full opening all together kit, not individual.
0:01:06 – (Ryan): We do not sell individual sashes, and I’ll tell you why. Double-hung sashes have to be a matched pair. Okay? So what happens is you can’t intermix different brands and different models because they have to be able to meet in the middle. Hence, this is why this is called the meeting rail. If they don’t line up and they don’t seal, you’re not going to get a functioning window. So, and then the other piece of it is we got a lot of questions about individual brand specific sashes.
0:01:41 – (Ryan): Couple reasons why we can’t do a brand specific sash. The reason why we can’t do individual brand specific sashes really comes down to supply chain. Those parts and pieces for all those different models of windows simply just aren’t available to us anymore because of the universal properties of our sash kit. It works with a multitude of different brands and models of windows, making it very universally workable with just about any application you have.
0:02:11 – (Ryan): Let’s get the do’s and don’ts out of the way. So just in case our quicksash kit doesn’t work for your application, you don’t have to sit through the rest of the video. So let’s start with the basics. It has to be a wood window. Can’t be vinyl. Can’t be aluminum. Now, it can be aluminum clad on the outside. It can be painted on the outside. That doesn’t matter. But it has to be wood window. It has to have vinyl compression jamb liners on the sides. So what that means is you have vinyl tracks on the side that are compression fit.
0:02:43 – (Ryan): So that is what’s actually holding the sash in by pressing out on the liners. That’s what allows you to release the sash and pull it in towards. If your window has slide locks on the top, that would release the sash in or has a fixed liner that doesn’t compress, that is a different style of construction of window, and our kit will not work with that type of window. Now, looking at the outside, there are some limitations on how the sill of the window frame is shaped.
0:03:18 – (Ryan): It can be sloped, but it has to be flat. There are some models of windows that have a stair stepped sill where this would not be a flat surface, and it would shorten the overall height of the unit, and it would not allow our standard sizing to work with that type of window. Another thing is some windows have a rib of some sort that runs across the sill that the sash actually fits down over the top of.
0:03:46 – (Ryan): So you cannot have any kind of stair step or rib on your sill to allow the sash to go all the way down. Now, finally, the last point I’ll make. Our sashes are an inch and three eight thick. You need to look at your head jamb. Most windows will have a gap between the outside of the frame and will have some sort of either plastic or wood stop on the inside of the window. You have to have an inch and three eight clearance in order to allow the top sash to go all the way up into the head jamb.
0:04:22 – (Ryan): Our stock sizes that are shown in all of the drop-down sizing boxes are industry standard, rough opening sizes. Now, what that means is the period that these type of windows were most common were the eighties and the nineties and the early two thousands. Most manufacturers made their windows very similar. Most of those brands all used common industry sizing. So as long as your measurements are matching our stock sizes, it’s a very high probability that you’re going to have a successful fit.
0:05:02 – (Ryan): Now, when measuring for the kit, we really only are looking for two different measurements. Okay. The one measurement that you’re going to find is we are looking for the overall width of the sashes themselves, as you’ll see, usually even numbers to the half inch. So we want the width of the sashes, and then we also want the entire length or the height of the vinyl jamb liner. So you are going to measure from the very top square down to the long point of the liner, and that’s going to give you your overall height for the kit.
0:05:42 – (Ryan): When you’re measuring, we allow for a plus or minus 8th of an inch tolerance in those measurements. The way these windows are constructed, there is a lot of play and give in how they’re put together. Like I mentioned earlier, the compression fit, the foam on the back side of the liners is really just pressing against the sashes, holding them in. There’s no fasteners, there’s no screws. It just all kind of squeezed in there.
0:06:11 – (Ryan): So if you are measuring plus or minus an 8th of an inch, if you’re under what our measurement is, okay, so our sash is just going to fit a little tighter than what the old ones were. And if you’re over our measurement, okay, well, maybe our sashes are just going to fit a little looser than the old ones did, but you have to account for a little bit of tolerance in there just because it’s made to fit so many different brands and models. The sashes are sized to fit the size of the liner. So it’s important to pay attention to how much gap you may have, if any, between the top of the liner and your head jamb, because usually gravity would have just pushed everything down to the bottom so you could have a gap at the top. So that’s something to consider when you’re thinking about the overall height sizing of the kit. And will it work or not? They are sized to fit that. Exactly. So what a couple things that you can do is we put a very heavy foam filled bulb weather strip on the top of the sashes. Now, a lot of windows don’t even have weatherstripping on them at all. So if you are fitting tight in the opening, maybe you’re just barely getting them locked or you’re squeezing them.
0:07:30 – (Ryan): You can remove that top piece of weather stripping and not have any issue because your window is going to it tight up to the head jamb and seal up just fine. And that’s going to give you some extra play in the height. Now, going the other way, maybe you have a bigger gap than, you know, what would be normal, or just the way the window was built, or things have separated over time. We do offer a filler strip that you can purchase separately to fill in the head jamb if need be. But that’s very rare that you would have to do that. Last thing I will talk about here on the sill.
0:08:05 – (Ryan): We have a lot of questions about does the degree, degree of slope on the sill matter? 14 to 15 degree is the most common in the industry. You have some 1012s out there, but again, that’s rare. So the way our bottom sash is designed, again, we have that same thick foam-filled bulb weather strip at the bottom. I’ve literally designed that. So the sash doesn’t sit right down on the sill. It rests on that weatherstripping. So if you can imagine how that sash would sit on there, it really doesn’t matter the degree of the sill because you’re kind of sitting on that weatherstripping. You’re not sitting on the actual slope of the sash. The sash does have a 15 degree bevel on it, but with that Weatherstrip holding it up, it really doesn’t matter. Now, if you have a shallow slope, you know, like a ten or a twelve, maybe, you’d have to trim the bottom of the jamb liners to match that slope. But again, that is very rare. And I would even say most people wouldn’t even care about that or notice that because the difference would be so slight due to its universal design, it has to accommodate any number of different situations. But it’s incumbent upon the customer to do their due diligence to understand this information, take proper measurements, and assess the condition of their windows.
0:09:33 – (Ryan): Simply something we can’t do for you from our office that maybe we’re 600 miles away. You know, that’s something that has to be done on site. It’s something that you have to have hands and eyes on. We’re not able to diagnose fitment issues from here. All we can do is provide you as much information about our product as we can, and hopefully that makes you an informed and confident customer when you go to make your purchase.
0:10:03 – (Ryan): Finally, let’s talk about design and available options. I like to point out some specific features about our kit for folks who are concerned about how they would match their existing windows. So let’s start with exterior finishes. These are available in a clad aluminum clad model, which would either be white or sandstone, which this is the sandstone. Or you can get that in pre-primed for painted wood so you can paint it to the color of your choice.
0:10:34 – (Ryan): You have two color choices of jamb liners. You can get that in white or again, in the sandstone. One particular difference that you might see, particularly on a cladded unit, is we use square butt joints on our cladding. Now that would match more of like the crad coat style window, but we also have a lot of customers that are doing this. On an MW retrofit, MW used a mitered corner, so in that case, they would look a little bit different. But again, a minor difference. When you’re talking from one window down the wall to another, just dimensionally, our sash dimensions. You have a three inch bottom rail. You have a three inch top rail, and you have inch and three quarter stiles and meeting rail in the center.
0:11:27 – (Ryan): Now to the interior, we can talk about finishes. You can either get this bare wood, as this one is, or we can pre prime them. If you have a painted interior surface, those are your interior options. Ours has a glass stop or a trim stop that is unique to us. This is our signature stop. It gives a nice little decorative detail to the window, but it helps us identify that it’s our window down the road for any warranty issues.
0:11:56 – (Ryan): We have a continuous lift rail on the rails, top and bottom. No finger pulls or any kind of hardware like that. So it is a very generic, universal look. Lot colors you can get in white or brown. Now let’s talk about grille options here. On the top, we have a surface applied grille or an SDL that stands for simulated divided light. That’s when you have grille bars that are attached to the surface of the glass, both on the inside and the outside.
0:12:27 – (Ryan): Those would be color matched to whatever finishes you selected. Down below you have a frameless grille insert. That is a wood grill insert that is just held onto the window with the pins, and you can remove that to see. Your final option would be an internal grill or grills between the glass. Those would be available in either the sandstone or the white. So there you have it. That is the particulars and specifications and design behind our quicksash double-hung sash kit.
0:13:03 – (Ryan): If you need help with installation, please check out our installation video that’s also on the website. I’d like to thank you for your time. My family and I appreciate your business.


0 Comments